Author: TCR Staff

4th of July Fun Facts & Free Activity

4th of July Fun Facts and Free Activity

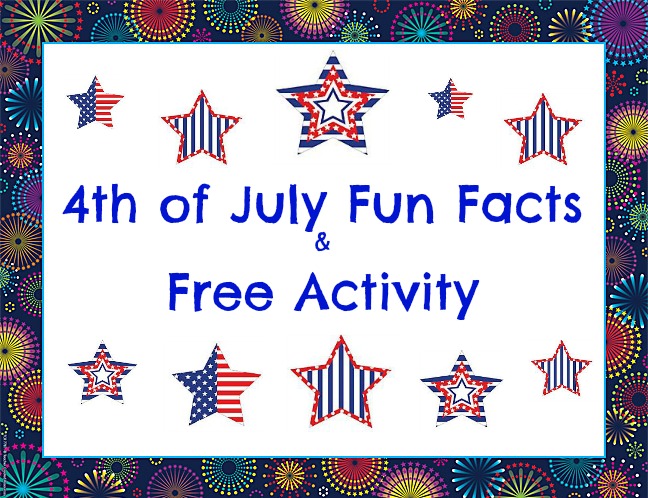
4th of July is all about patriotism and fireworks. Share these fun historical facts about the history of 4th of July with your kids, then try some of the suggested activities to celebrate.

4th of July Fun Facts

  • Independence Day is celebrated every year in the United States on the Fourth of July.
  • The liberty bell weighs 2080 pounds and its circumference is 12 feet.
  • The Declaration of Independence was written by Thomas Jefferson.
  • On July 4, 1776, the Continental Congress adopted the Declaration of Independence that gave freedom to all who lived in the United States.
  • The Declaration of Independence was first read to the public in Philadelphia, where it was celebrated with bells that rang all night long.
  • Twelve of the thirteen original colonies approved the final draft of the Declaration of the Independence.
  • The first Independence Day celebration took place on July 4, 1777.
  • On the 4th of July, we celebrate the birthday of the United States.
  • People celebrate the 4th of July by going to picnics, parades, and firework shows.
  • In 1941, Congress declared the 4th of July a federal holiday.
4th of July Printable Decorations from Big & Easy Patterns & Celebrate the Holidays

4th of July Fun Activity Suggestions

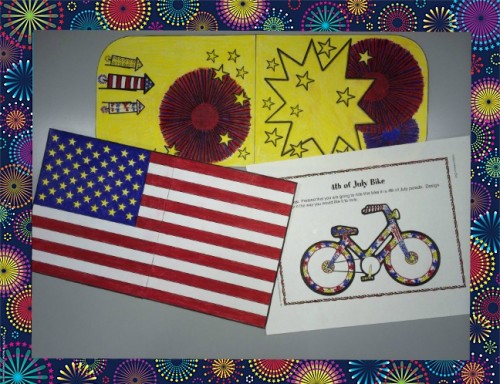
  • Create and color your own U.S.A. flag and 4th of July pictures. Use them as decorations for a 4th of July party.
  • Create a mural of a 4th of July parade using paint and a roll of paper across the wall.
  • Discuss the Declaration of Independence and have the students write about the importance of freedom.
  • Compose an acrostic poem with the word “independence”.
  • Do patriotic brain teasers and word scrambles. Download free USA Brain Teasers here.


*Facts from the following books: Patriotic Songs & Symbols, Celebrate the Holidays & Multicultural Holidays

Math Manipulative Games

Math Manipulative Games - Teacher Created Resources

Many teachers know that manipulatives are helpful for teaching math to kids, especially younger kids. Using physical objects is a hands-on approach to learning math that helps kids develop math concepts. Pairing number spinners with counters is a great way to teach math by allowing kids to problem solve and count. Here are some great math games to play using math manipulatives and number spinners.

Addition & Subtraction Manipulative Games for Pre-K, Kindergarten & 1st Grade

Number Spinners & Counters - Teacher Created Resources

Practice basic addition and subtraction facts by having students spin a number spinner, this will be the first value. Then have the students spin again on another number spinner, this is the second value.  Have the students subtract the second number from the first. Have the students state their answers and show them using counters.

Here’s another game you can play using number spinners:

Number Sense and Place Value Game for  2nd – 3rd Grade

Have students practice spinning any of the number spinners and then call out the number they land on. Students can write the number down in word form, to practice the correlation between the word and the numeral representation.

Have students practice this with larger numbers, asking them to spin twice or even three times to make two-and-three-digit numbers. For example, if a student spins three times, and first spins a 3, then a 6, then a 9, he or she should write down the number 369.

Then have them write “three hundred sixty-nine” next to the numerals. Have students practice comparing different numbers they spin. If they first spin the above number (369), then an 8, a 2, and a 1, student should write: 369<821.

Teacher Tips: End of the School Year Organization

Teacher Tips End of the School Year Organization Teacher Created Resources

Testing is done and you had another fantastic year of teaching! The school year is coming to an end but there’s just one last thing left to do—pack up the classroom! It’s important to do as much cleaning, packing, planning, and organizing in the classroom before the school year ends. It will save you a lot of time and stress when school is back in session. Here are some great end of the school year organization and summer tips that will keep you organized and prepared while you relax this summer.

Chevron Name Tags - Teacher Created Resources


1) Store everything in plastic bins with labels. On the label, write down the contents of the box as well as where the box will go in the classroom. This will save lots of time when unpacking at the beginning of the school year.

2) Take photos of your classroom. Taking photos of your classroom after everything is cleaned up and empty will help you organize your decorating ideas for the next school year. Let’s say you found some cute accents, but are having trouble trying to remember what your classroom looks like in order to find the perfect spot for them? Keeping photos of your classroom will serve as a reference and give you a visual of what your next classroom theme will be.

3) Have students keep inventory of supplies in each center or section of the room. (I.e. Group A will keep inventory of how many pairs of scissors and glue sticks you currently have). Once you have this inventory, you will know exactly how many supplies you need for the next school year.

4) Keep a teacher memory book. Add photos of field trips, class photos and more in a memory book. Writing down things like “funniest moments of the year” and “favorite classroom activity” are fun memories to look back on. Having a hard copy book is a great keepsake for yourself and the students.

5) Stay involved. Attend teacher conferences and workshops in the summer to keep yourself learning new things. You will be surrounded by like-minded teachers that love teaching just as much as you do.

6) Pin, Pin, Pin. Use Pinterest to pin lessons and projects you’d like to save for the following school year. Create boards and organize them by subject.

7) Have older students or parents help clean up the classroom. Play some music and offer snacks and you’ll see just how quickly your classroom will be clean.

8) Out with the old, in with the new. Let go of any items you no longer need and put them in a box with a sign that says “free.” Put the box in the teacher lounge for other teachers to take. Sometimes getting rid of items is difficult, so offering them to other teachers is a great way to reuse and share. This makes room for all the new supplies and decorations you will need for the new school year.

Bulletin Board Idea: Aloha to a Great Year

Aloha Bulletin Board Teacher Created Resources

Summer is right around the corner! Here’s a fun idea for a bulletin board. Mix your spring and summer accents to create a bright end-of-the-year Hawaiian style bulletin board. Use yellow paper for the background (or any other brightly colored paper). Layer the sides with Fun Flowers Straight Border Trim, Green Scalloped Border Trim, and Hot Pink Polka Dots Scalloped Border Trim. To create the Aloha banner, grab a thin piece of ribbon and string it along the pre-cut holes of the Sassy Solid Pennants. Use Multi Bright Sassy Solids 3″ Letters to spell out “Aloha” on the pennants. Add four pieces from the Sassy Dot Hearts Create & Decorate  Set in the middle of the board, and use the rest of the Sassy Solids Letters to spell out “to a Great Year!”. Finish off with Fun Flower Accents  & Surfboards Accents. To personalize the bulletin board more, have each student pick their own surfboard to put on the bulletin board. They can write their names and add stickers to make the surfboard completely their own.