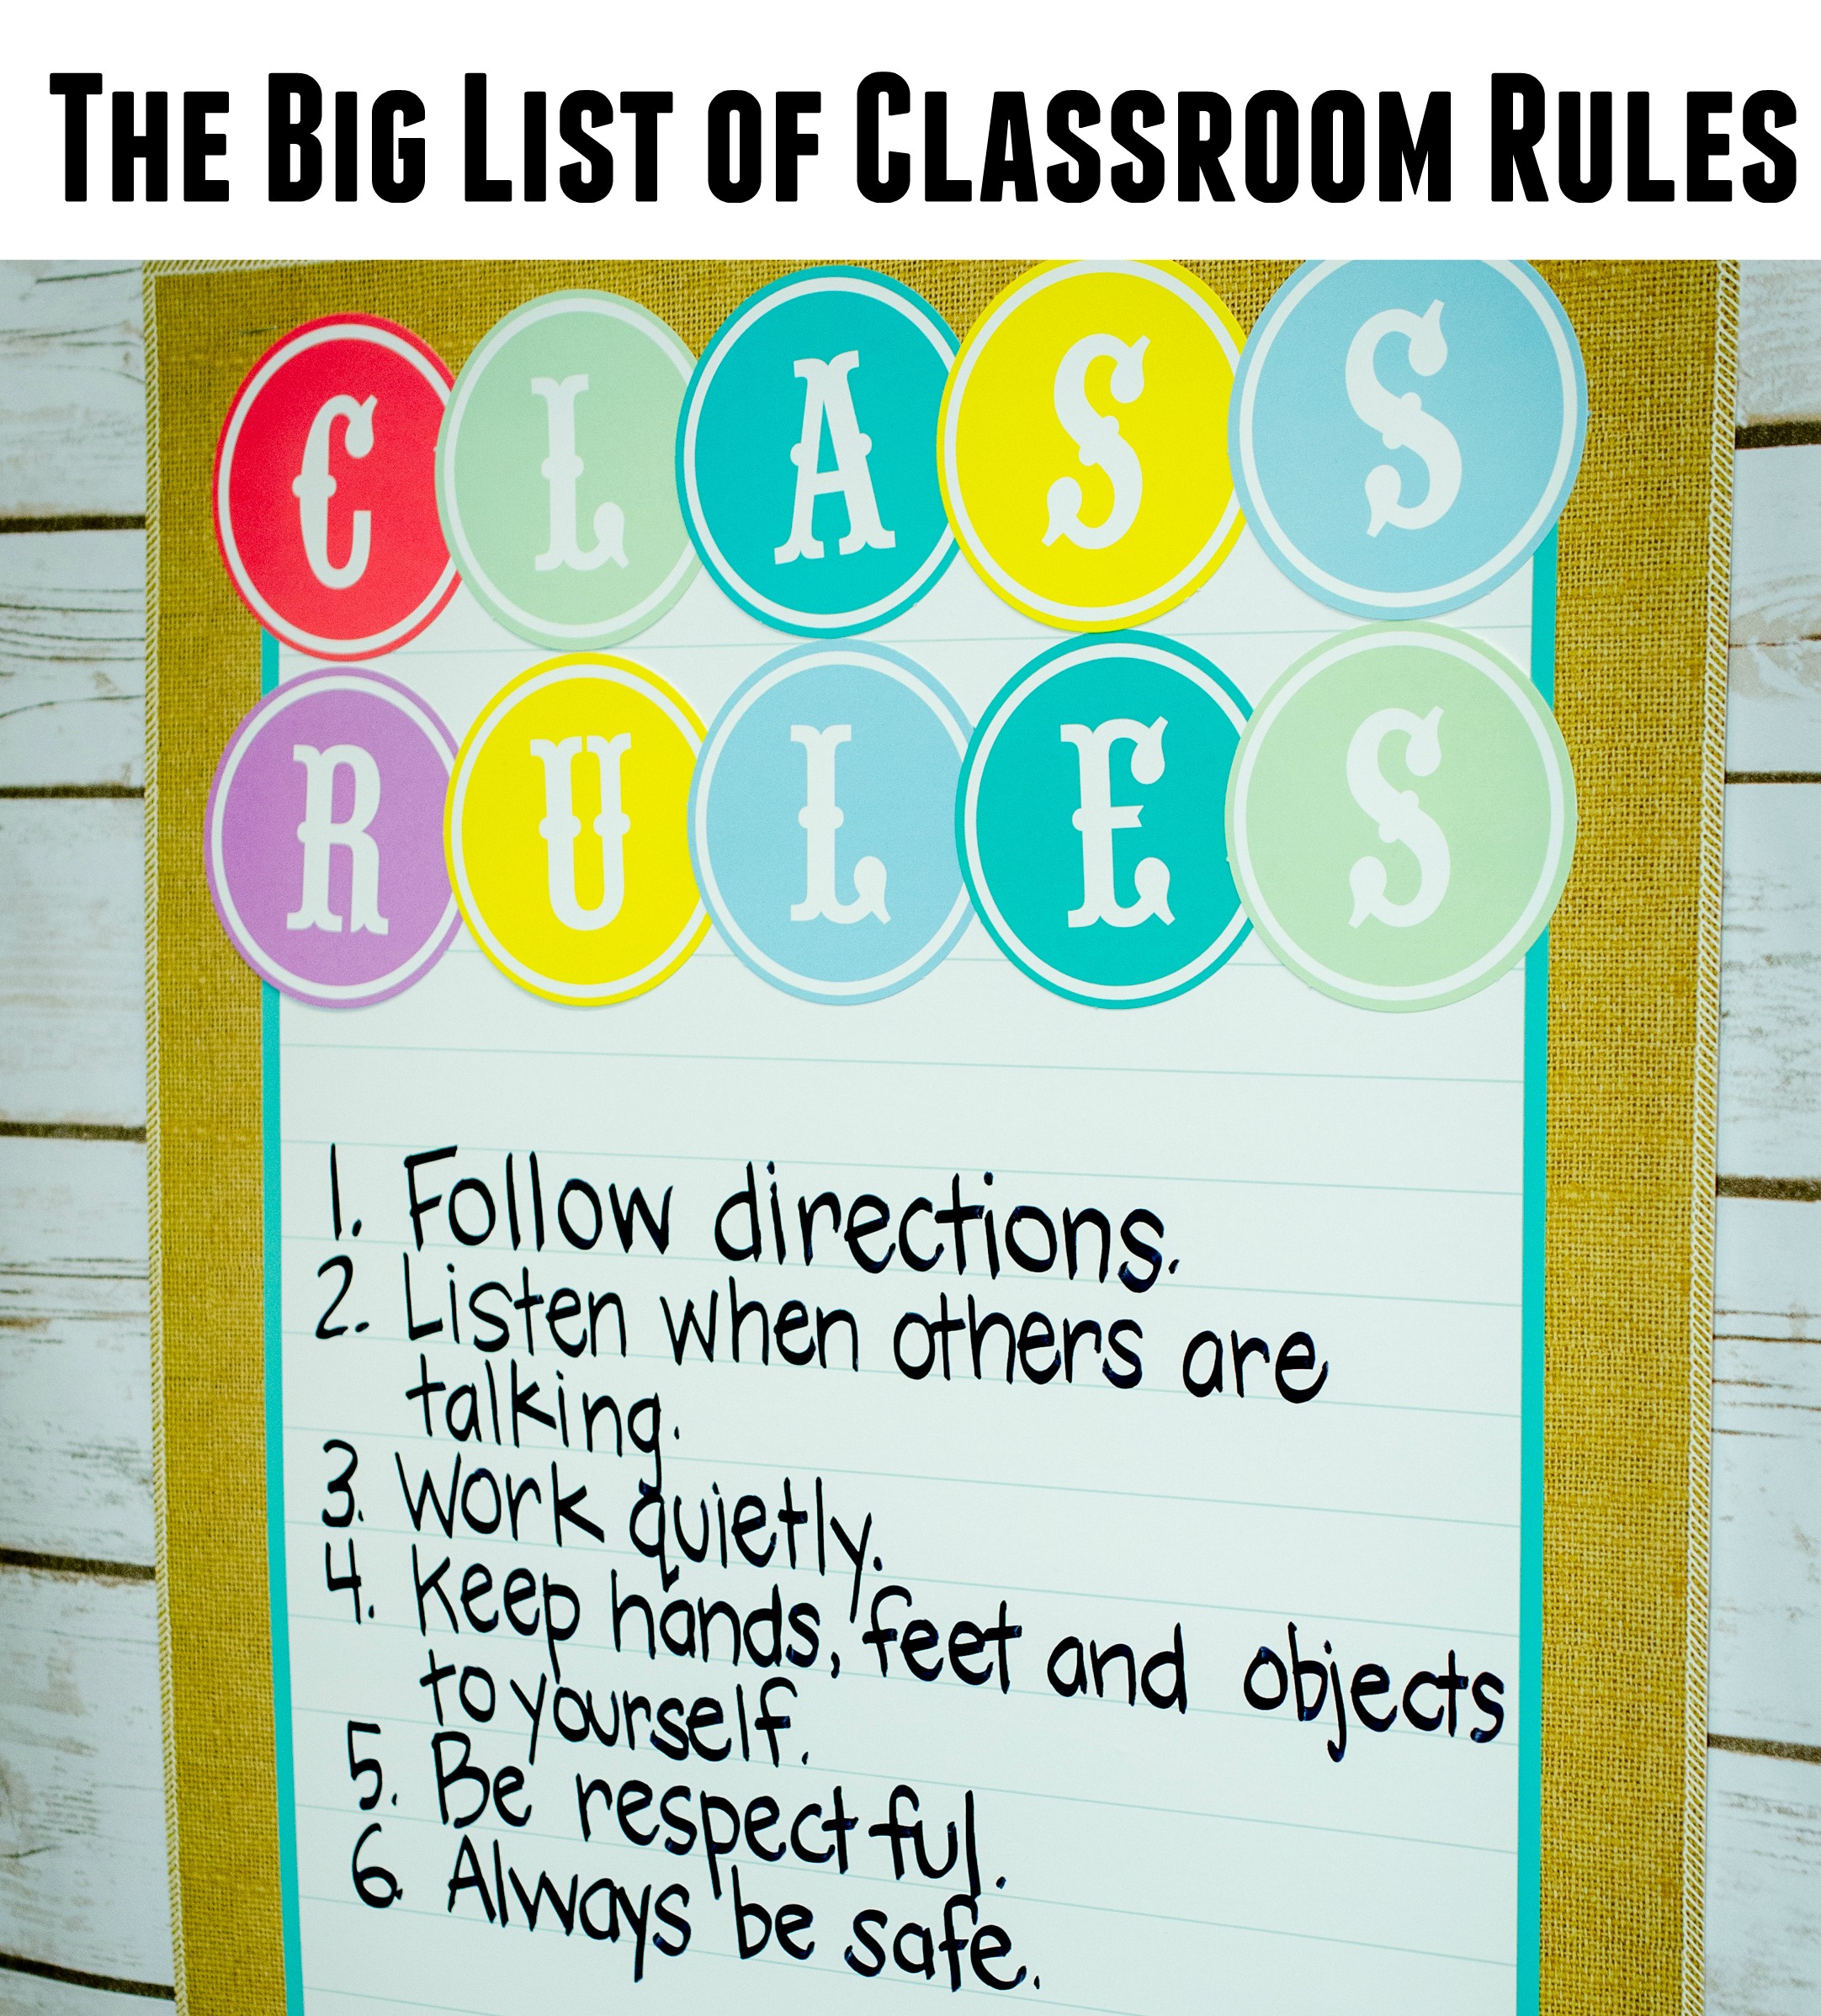
 Setting up a successful writing center for your students is easy. All you need is a little prep work, and your students will be motivated to improve their writing skills. We created a writing island and added all the resources students would need to practice their writing skills.
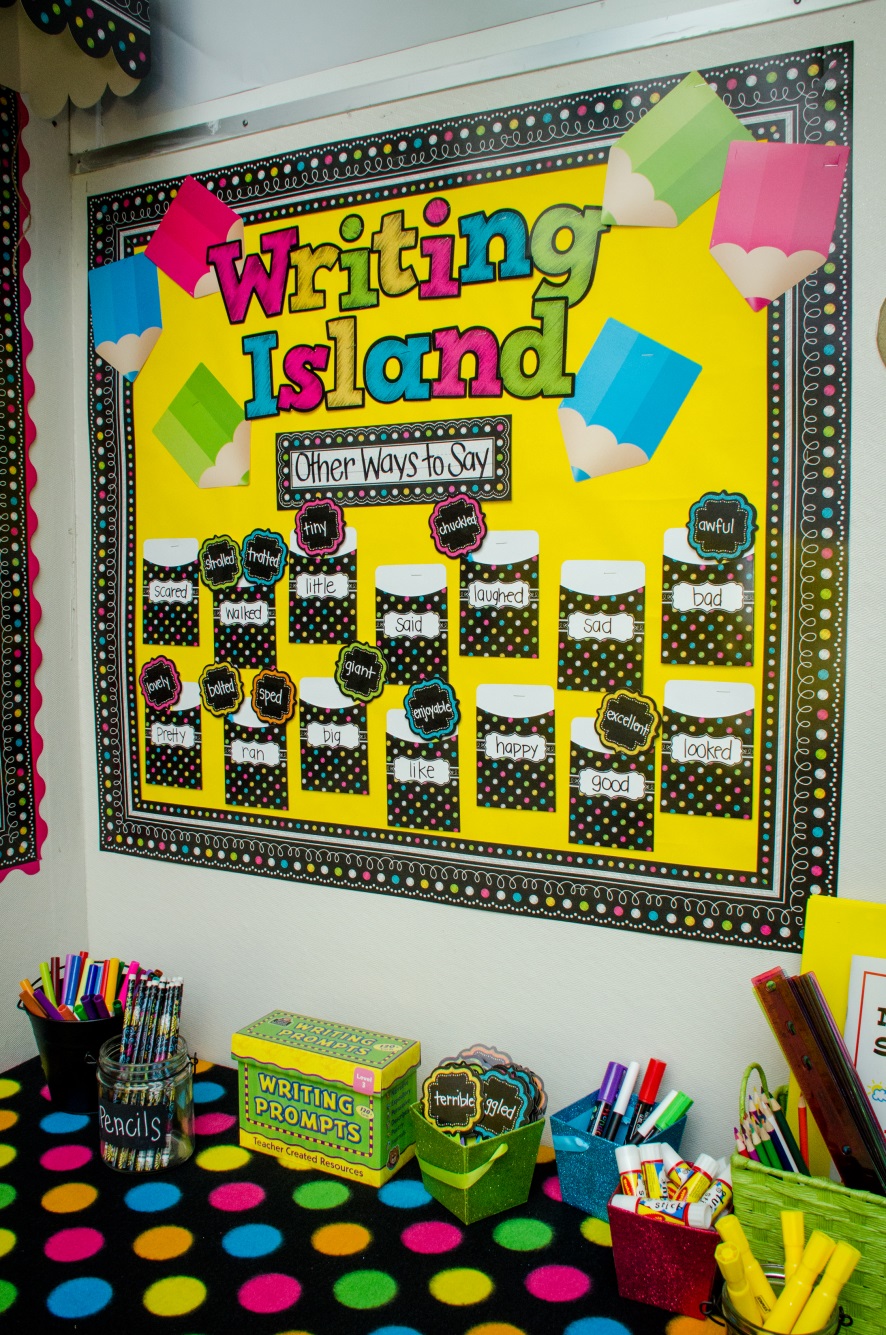
Create an “Other Ways to Say” bulletin board in your writing center to help students improve their vocabulary and understand synonyms that can be used when writing. First, write words on Library Pockets. We wrote words like “happy, good, and bad”. For each word written on a library pocket, write two synonyms on a mini accent. In this photo we used Chalkboard Bright Mini Accents, and glued them to Plastic Craft Sticks. Keep the synonym craft sticks in a decorative box in the writing center. Students can start with a synonym activity by placing the synonym craft sticks in the corresponding library pocket. From there, ask students to use Smart Start Writing Paper to write a story. In their story they must include synonyms reviewed in the activity. You can also have students choose a topic to write about using Writing Prompts. Students can choose writing prompts in six different categories: Narrative, Expository, Persuasive, Descriptive, Poetry, and Journal Writing.