Author: Brenda Stickland-Guest Blogger

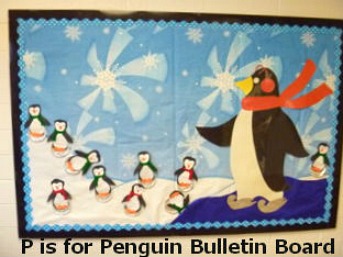
P is for Penguin Bulletin Board

P is for Penguin


P is for Penguin 2

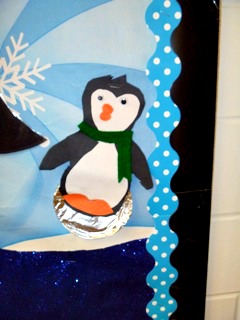
Happy New Year, everyone! Currently, our class is studying the letter “P”. To enhance the students’ learning, we created a “P is for Penguin” winter-themed bulletin board. I purchased this bulletin board background, but you could make your own snow background. You can use blue holiday paper to make the pond, and plain white paper to create the snow slope.

Make a large penguin wearing skates out of black, white, yellow and beige paper. The students can help make the small penguins. Use felt material to make the penguin scarves. To make the snow saucers, use Styrofoam cup lids covered in aluminum foil. To add a little humor, we had one penguin land in the water!

How do you incorporate learning letters into your classroom?

The following items were used to complete this board:

TCR4670 Aqua Polka Dots Border Trim
TCR4397 Black Border Trim

The Night Before Christmas Bulletin Board

The Night Before Christmas 1

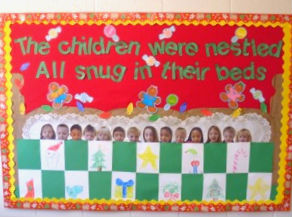
I love making holiday bulletin boards! In my classroom, we discuss and sing all of the traditional Christmas carols. For these Christmas bulletin boards, I used photographs of all the students to make them more fun and personalized.

One of my favorite poems is the Christmas classic by Clement Clarke Moore, The Night Before Christmas. I read this poem to the students and then explain to them some of the parts that may not make sense in our modern world such as, visions of sugar plums, night caps, and threw up the sash. Here are step-by-step instructions to create a Night Before Christmas bulletin board in your classroom.


The Night Before Christmas Bulletin Board

1. Fill the bulletin board with red paper. TheNight Before Christmas 2

2. To make the headboard, cut brown paper bags into the shape of a bed headboard and glue or staple to the board.

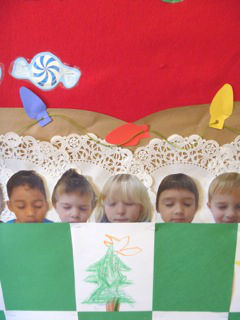
3. To make the pillows, line the brown paper bags with white dollies.

4. Take a photo of each of the students with their eyes closed, cut it out and staple it on top of the dollies.

5. Have the students draw and color holiday pictures on white paper to make the quilt.

6. To make the quilt, alternate green construction paper with the students’ holiday drawings and lay over the photos.

7. Use bulletin board letters to display “The children were nestled, all snug in their bed.”

The following items were used to complete this board: 

TCR4175 Yellow Scalloped Border Trim

TCR4157 Christmas Scalloped Border Trim

Finishing Touches

Add holiday accents like Christmas light bulbs, candy, gingerbread etc.


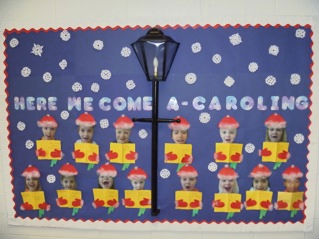
Christmas Caroling Bulletin Board

Fotor1209105610

1. Fill the bulletin board with blue paper.

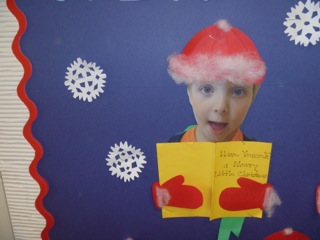
2. Fold a piece of rectangular paper in half. Each student would need to write the name of a Christmas carol on the front of the paper to create a song book.

3. Take a photo of each student with their mouths open as if they were singing. Cut out the photo and staple to the bulletin board.

4. Use dye cuts to create hats and mittens. Attached the hat to the top of the students photo, and attach the mittens on top of the song book.

5. Trim hat and mitten with cotton batting for a snowy, winter look.

6. The light post was made by my volunteer. He took an old one he had at home and created a light weight one without glass to hang on the board. You can easily make one out of paper.


The following item was used to complete this board:Christmas Carol Bulletin 2                          

TCR4174 Red Scalloped Border Trim

Finishing Touches

We made snowflakes out of tissue paper but you can also add any snowflake accents you may have.

Try this one!

TCR5243 Snowflakes Accents

The Mayflower Sails Again!


Mayflower Bulletin Board

Time to learn about Thanksgiving and why we share a day with family and friends to give thanks.

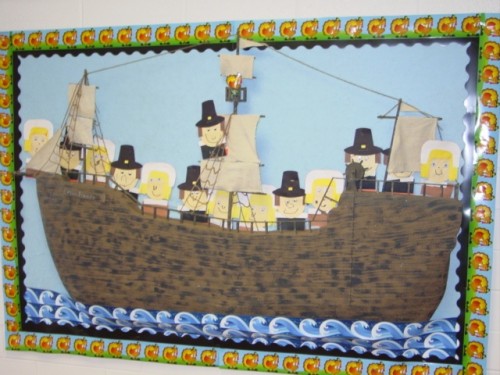
Since most students today have little concept of travel to our country in the early days, I like to show them what the Mayflower looked like.  We talk about the sails and why wind was so important—no engines! No refrigerators, microwaves or computers either, but for now, let’s concentrate on the ship.

The whole bulletin board can be done with different kinds of paper, but we like to get “fancy” in my class!

The Mayflower
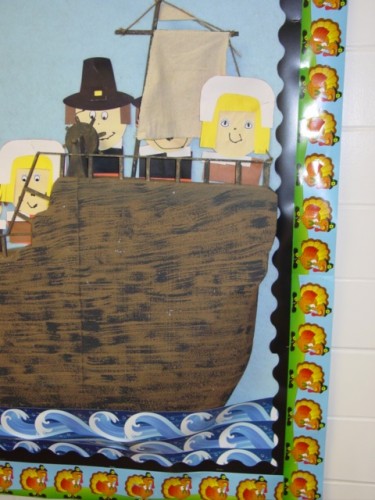
1. Cut out a ship.  I cut large pieces of Styrofoam and we paint it brown.

2. Create “wood grain” by painting long, vertical lines using a darker color.  Demonstrate by painting the top plank and if appropriate, have each student add a “plank” by following your line above. (Great for eye-hand coordination!)

Hint:  Don’t put a lot of paint on the brush so it will be streaky.
3.  I use dowels and yarn to create the rigging and we add cloth sails.

4. We will add details to the ship as time and interest allow.  Sun, birds, fish, student writing….
Mayflower Bulletin BoardThe Pilgrims 

1. The Pilgrims heads are circles and their bodies are black or brown rectangles.

2.  Create templates for hair, collars, and hats based on the size of your Pilgrim’s heads.

3. Have each student draw a face and other details on his or her Pilgrim.  This year I found eye stickers to use as a special treat!

4. Don’t worry if you have to crowd your Pilgrims on the ship—it was very crowded on the voyage in 1620!

Finishing Touches

TCR5358Ocean Waves Border Trim

TCR4397Black Scalloped Border Trim


 Thanksgiving Today

This next bulletin board is about Thanksgiving today, though the word “maketh” in the title connects it to our study of the first Thanksgiving. Thankful Bulletin BoardFirst, we listed and graphed some of our favorite Thanksgiving holiday foods and talking about our different family traditions.  Then, we got busy creating our board.  Since food is such a big part of Thanksgiving traditions, we started with our stomachs!
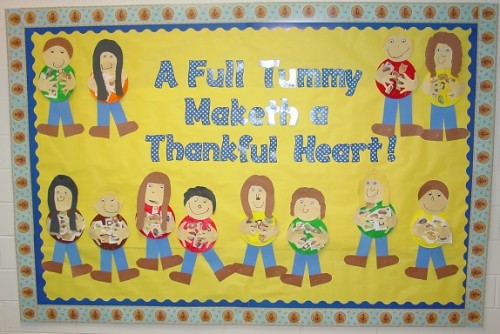
1.  We each painted a paper plate to use as the mid-section (stomach).  It’s best to let the plates dry overnight.

2.  I found clip art for our favorite foods, pasted them on a piece of paper, and made color copies.

3.  The students cut out their favorite foods and glued them onto their “stomachs.”

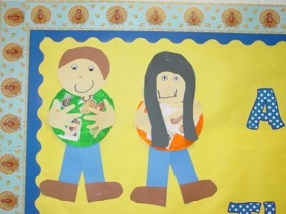
4.  We made our heads using circles cut smaller than the paper plates.   Students cut hair similar in color and length to their own and glued it to the heads.  They used eye stickers and added other facial features using crayons and markers.

5.  We used long rectangle shapes for legs and added precut shoes.

6.  After stapling the head and legs to the stomachs, we added the finishing touch—hands!  I use the die-cut ones but you could have students trace their own.
Thankful Bulletin Board

Wishing you all a happy Thanksgiving!


The following items were used to complete this board:

TCR5347—Blue Polka Dot Funtastic 4” Letters.  These letters make the board pop and the kids love them!

TCR 4173—Blue Scalloped Border Trim

TCR 4751—We Are Thankful Straight Border Trim from Debbie Mumm